Connecting to ConnectTo.Net using Mac OS 8
You must have selected "Internet Access" from the list of software when you installed Mac OS 8 on your computer. If you performed an Easy Install, or your computer came with Mac OS 8 pre-installed, then the software described below will be available on your Macintosh. Otherwise, run the Mac OS 8 installer and perform a custom install, selecting just the Internet Access option for the displayed list.
- Locate the Internet Setup Assistant program on your computer. This is typically located in the "Client Access" folder in the "Internet Utilities" folder in the "Internet" folder on your hard disk. You can also start it by double-clicking on its alias in the "Assistants" folder located on your hard disk:

- Double-click on its icon to launch it:
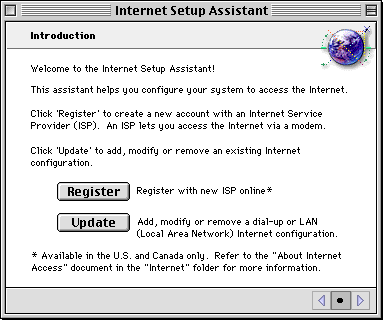
- Click on the Update button to add a new configuration. The Internet Setup Assistant will display a screen of introductory information:
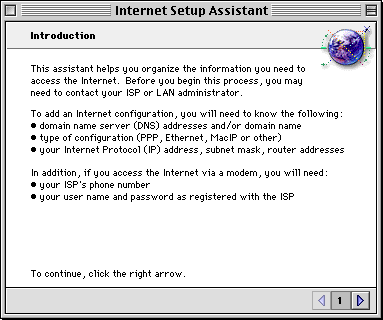
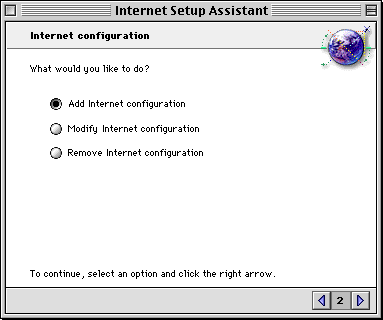
- Click on the right-arrow button in the lower-right corner of the dialog. The assistant will prompt you to select the type of configuration activity you wish to perform. Select Add Internet Configuration as shown below:
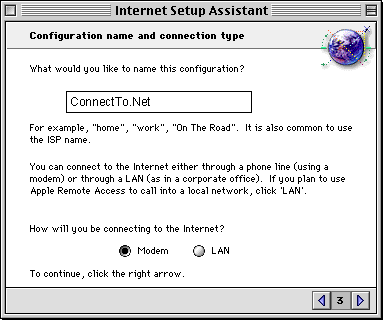
- Click on the right-arrow button to proceed. The assistant will prompt you to enter a name for this configuration. In the example, below, the name "gct21.net" has been entered:
- Click on the right-arrow to proceed. You will be prompted to select the type of modem you will be using with the configuration. Select your modem from the list, the port to which it is connected to your computer (typically the modem port), and either tone or pulse dialing:
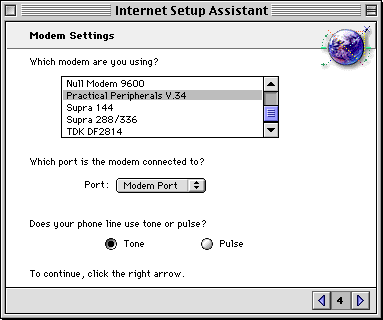
If your modem does not appear in the list, try selecting "Hayes Acura 288" or "Supra 288" as alternatives.
- Click on the right-arrow to proceed. The assistant will ask you to enter the telephone number you will be calling and your account name and password. In the example below, the number "392-2021" has been entered and the account "abby".:
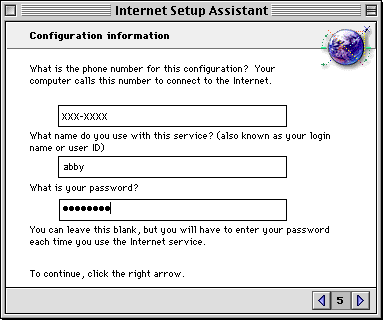
- Click on the right-arrow to proceed. You will asked whether or not you have been assigned an IP address for your account. Because this is acquired dynamically when you connect, you can click on the No button:
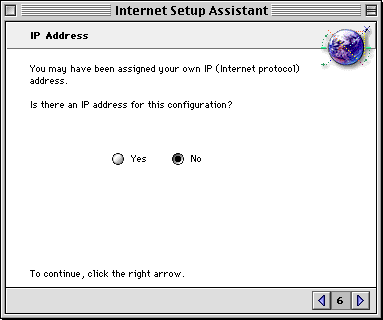
- Click on the right-arrow to proceed. The assistant will now require you to enter Domain Name Server (DNS) information for ConnectTo.Net. Type this information exactly as shown below "216.186.129.50" and "206.14.186.1":
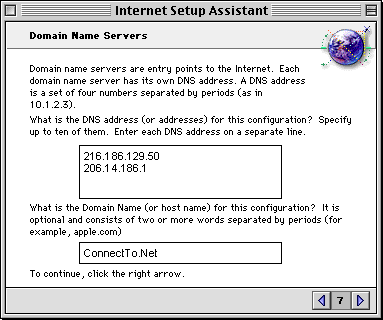
- Click on the right-arrow to proceed. You will be asked to enter your email address information. Substitute your email account and password in the appropriate fields as shown below:
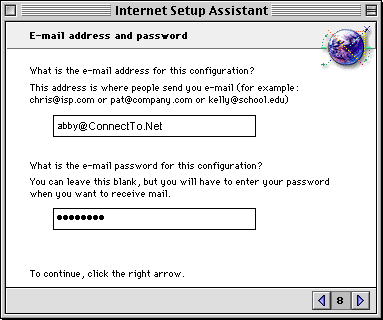
- Click on the right-arrow to proceed. The assistant needs the location of your email (the POP3 server) from which you receive electronic mail and the (SMTP) server which sends your email:
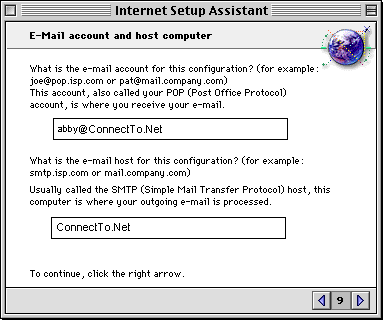
- Click on the right-arrow to proceed. You will be asked to enter the name of the news host for ConnectTo.Net. This is always "news.gct21.net":
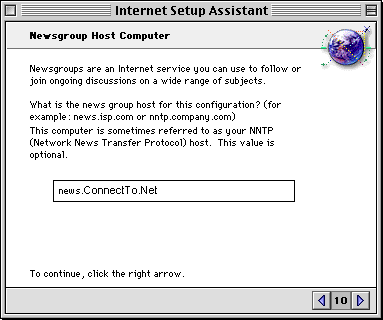
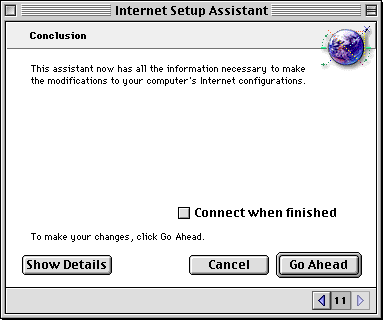
- Click on the right-arrow to proceed. Then click on the Go Ahead button to save your configuration and exit Internet Setup Assistant:
Using the PPP Control Panel
The PPP control panel is what you use to initiate a connection to the Internet using your modem. You may need to perform some additional configuration of the PPP control panel before you can connect.
Configuration for ConnectTo.Net Modems
- Open the PPP control panel. You will find it by choosing Control Panels from the Apple menu:

- Double-click on its icon to launch it:
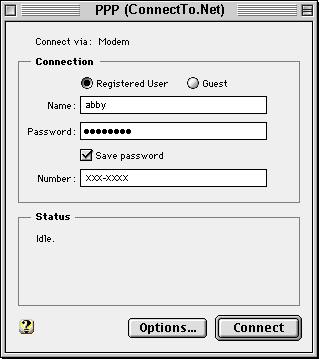
Notice that the title of the PPP control panel is PPP (ConnectTo.Net), which is the name of the Internet configuration that was created in the above section, "Configuring a Home IP Connection".
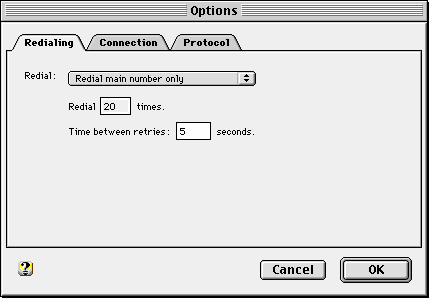
- Click on the Options... button to display the Options dialog. Click on the Redialing tab if it is not already displayed. Change the redialing options as shown below:
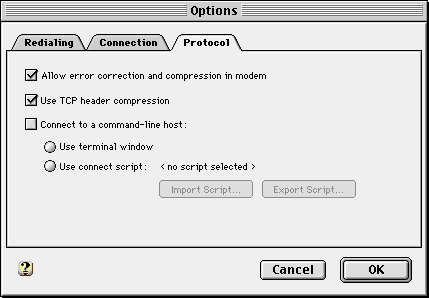
- Click on the Protocol tab. Change the protocol options as shown below:
- Click on the OK button to save your changes and redisplay the PPP control panel:

Connecting to ConnectTo.Net
- Open the PPP control panel:

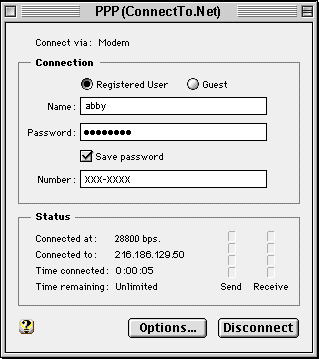
- Click on the Connect button to initiate the connection. A series of progress messages will be displayed in the Status frame in the lower half of the control panel.
![]()


![]()


![]()


