Click on the Start Button, then Programs, then Accessories, then Dial-Up Networking. You should see the following box:
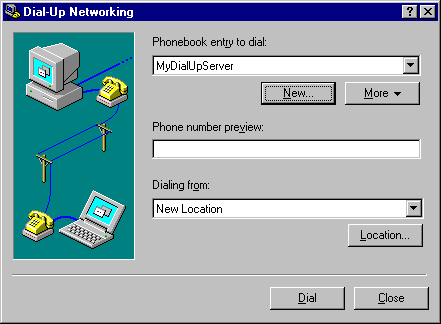
Click on New. You should see the following box:
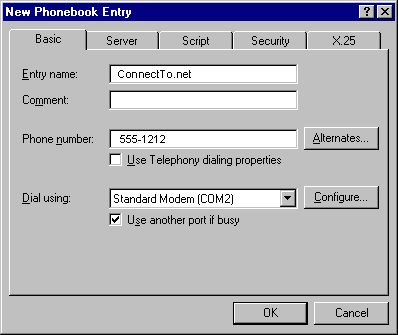
- Click on the Basic tab.
- In the Entry name: field replace MyDialUpServer with ConnectTo.Net.
- In the Phone number: field enter 392-2021
- In Dial using: select the modem you are using.
-
Click on the Server tab. You should see the following box:
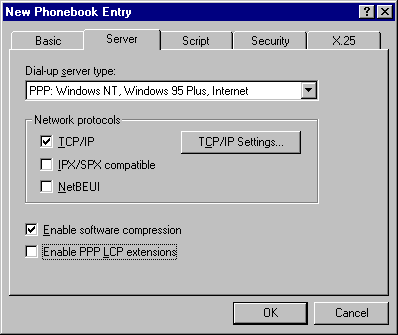
- Ensure that TCP/IP is checked.
- Make sure that IPX/SPX and NetBEUI are NOT checked.
-
Uncheck Enable PPP LCP extensions.
- Click on the TCP/IP Settings button.
-
You should see the following box:
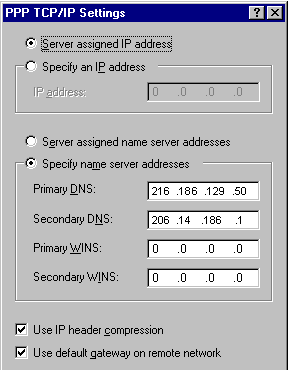
- Make sure that Server assigned IP address is selected.
- Select Specify name server addresses and enter 208.142.244.2 in the Primary DNS field. Enter 208.142.244.17 in the Secondary DNS field.
- Make sure that Use IP header compression and Use default gateway on remote network are both checked.
-
Click OK and then click on the Script tab. You should see the following box:
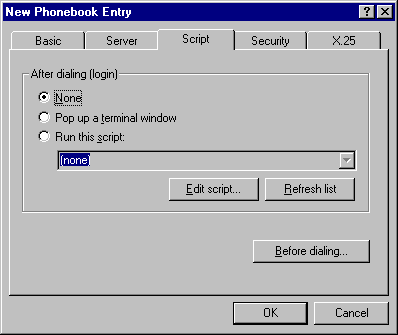
- After dialing (login) should be set to None.
-
Click on the Before dialing button. You should
see the following box:
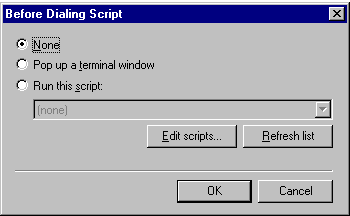
- This should also be set to None.
-
Click OK and then click on the Security tab. You should see the following box:
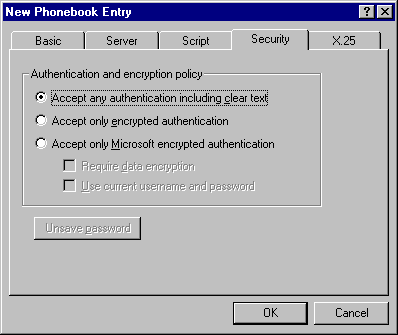
- Ensure that Authentication and encryption policy is set to Accept any authentication including clear text.
-
Click OK. You will return to the first screen with the new phonebook entry.
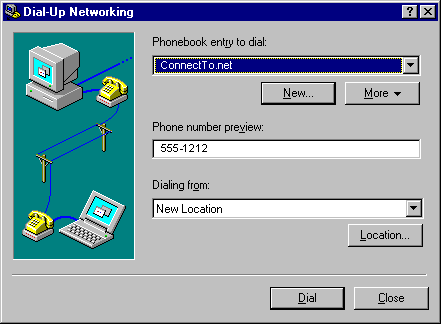
- To connect, click on the Dial button. The following screen should appear:
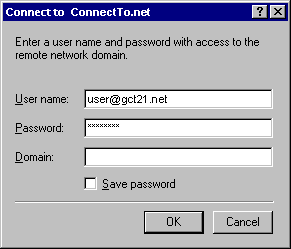
- Enter your username and password in lower case letters in the appropriate boxes. Leave Domain blank. Click OK to start dialing.