From the desktop, double-click My
Computer.
Double-click Dial-up Networking.
If you receive a message stating The
phonebook is empty. Press O.K. to add an entry, skip to the next section, Creating a
Dial-up Networking Connection.
If the Dial-up Networking window opens with
the phonebook list and the option to dial, again proceed to the next section to create a
new connection.
Otherwise, click Install, then point
to the path where your NT 4.0 install files are located (for example, D:\i386) and click OK.
Windows NT will now install the necessary files onto the hard drive.
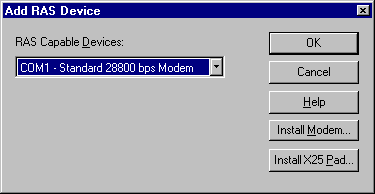
The Add RAS Device window will
appear. If you see your modem listed in the RAS Capable Devices field, then click OK
and proceed to the next step.

If you do not see a modem listed, then you
will need to install a driver for your modem as follows:
In the Add RAS Device
window, click the Install Modem button. This will start the Install New Modem
wizard. You can let Windows NT try to detect you modem automatically (recommended) by
clicking Next.
If Windows NT detects your modem,
then proceed through the wizard. If Windows NT is unable to detect your modem, you will
then have the option to select your modem from a list or use a disk provided by the
manufacturer. You may need to follow the directions in your modem's documentation.
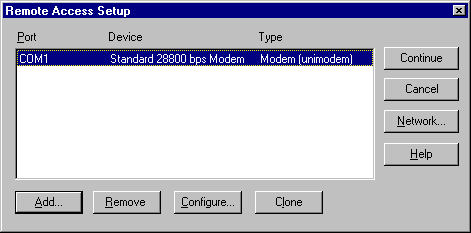
Highlight your modem and click the Configure
button.

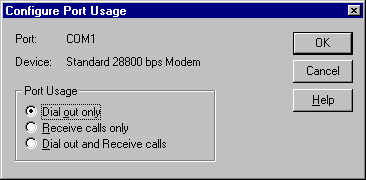
Make sure Dial Out Only is selected.

Click OK.
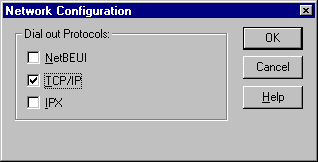
Click the Network button.
Make sure TCP/IP is the only box
checked.

Click OK.
Click Continue in the Remote
Access Setup window.
After Dial-Up Networking installation is
complete, click Restart to reboot the computer before continuing.
|