Windows CE Dial Up Set Up - by ConnectTo.net
This tutorial can be used to setup a Dial-Up connection
1. First you will need to open the remote networking window.
Go to START -> PROGRAMS -> COMMUNICATIONS -> REMOTE NETWORKING.
In there you will see this:
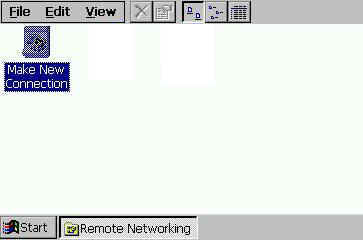
2. From there you will need to double click on Make New Connection.
This will bring up the next screen where you give the Connection a name and select
dial-up connection as shown below:
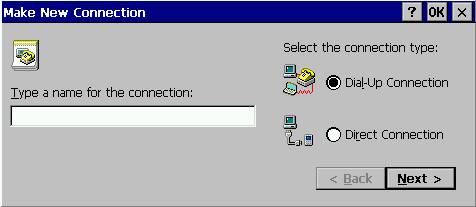
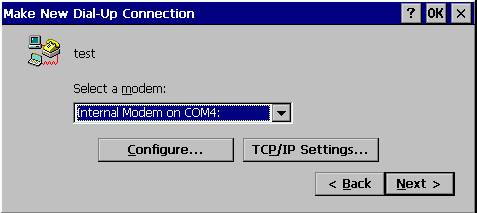
3. After you have filled-in the Name and selected Dial-Up Connection, click NEXT.
The next screen will allow you select the modem or connection device.
You need to make sure you choose Internal Modem On Com4 if you intend on using the built in modem.
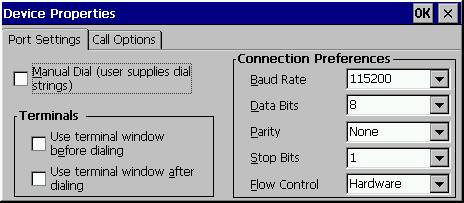
4. This is where you get into custom settings.
Under the CONFIGURE menu you will get the following windows:
And click the "call options" tab:
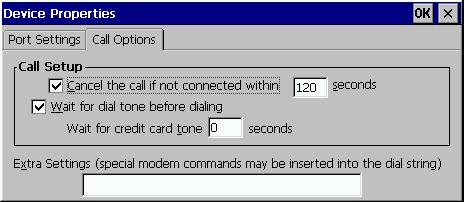
In these menus, you can choose to bring up a Terminal window before or after dialing.
This can be important for some ISPs.
Make sure you click OK so that the settings are added to the connection.
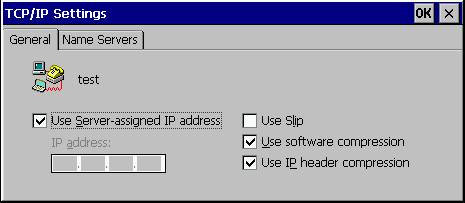
5. Next option is the TCP/IP SETTINGS button.
Select "use server-assigned IP address" unless you've paid for a static IP address (which is pretty unusual).
Do NOT select "slip".
Do select software and IP header compression as shown below.
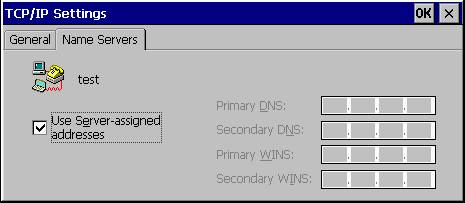
Click the names servers tab.
Remove the "server-assigned addresses" checkmark and then put in
64.42.89.140 for the primary DNS and 64.42.89.100 for the secondary DNS
.
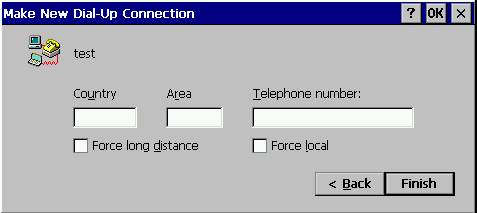
6. After you have setup your TCP/IP settings and clicked NEXT, you will get a window where you input the phone number of your ISP. This can be tricky. Some of the common mistakes customers make is to leave the Country and Area Code boxes empty. These boxes have to match whatever the customer put in for their dialing properties. (There will be an example at the end of this document.)
As you look at the boxes, you will notice a Force long distance and a Force local.
These can come in handy.
If you choose Force local then it will only try to dial the numbers in the For Local calls dial field in dial properties.
7. Once you create the dialup connection, you will now have an ICON in the Remote Networking box
with the Name you gave to the connection.
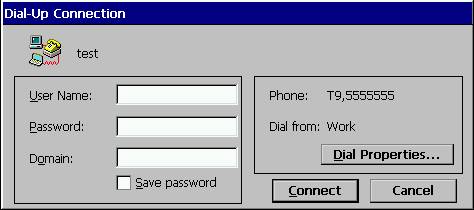
Double click on it and you will get this:
This is where you enter you User Name, Password, and can edit the Dial Properties.
At this point if there is nothing but a T where it says phone number
you will need to check out the next section.
How to setup Dial Properties
This section will go over the Dialing Properties issues.
This is a common issue with customers trying to setup a Dial-up connection.
One of the key things to look for is if it doesnt actually show a number to dial.
You also want to make sure that your username has @ispname.com on the end of it.
This will make sure that you get to your ISP rather than getting lost somewhere in the phone system.
Lastly, usernames and passwords are cASe seNsITiVe so make sure that your capitalization is correct.
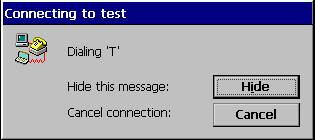
This one comes up after you click on connect:
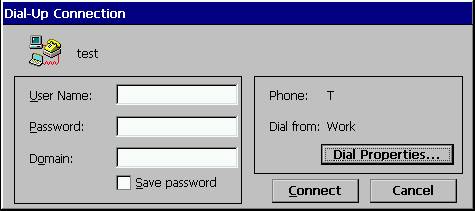
After you double click on your connection in the Remote Networking window, there is a button marked Dialing properties.
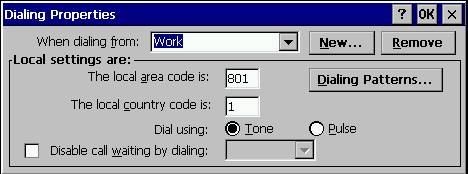
When you click on that you get this window:
This is an important window.
In here you need to make sure that "the local area code is" and "The local country code is" boxes are filled-in correctly.
Usually, leaving the country code at one is the best thing since most people do not use it.
You also need to make sure you leave it at 1 when you create a new connection.
This way you dont end up dialing unwanted numbers.
This next screen is accessible by clicking on Dialing Patterns button.
This is a very important part of creating a connection and getting it to dial the correct numbers.
The window looks like this:
In this screen you will notice that at the bottom there is a key to help you set this up.
The key is pretty straight forward.
The letters E, F, and G are just variables.
They take the place of the numbers they represent.
The current setup you see above is for an office where you have to dial 9 to get an outside line.
The first line is For Local calls dial.
This line is the setup for exactly that.
If you do not have to dial a 9 to get an outside line then you would only have G on this line.
As it is right now, if I had set the area code and country codes the same in both my dialing properties and in the connection I created then the system would assume it was a local call and use only this line.
The second line is For Long Distance calls dial.
Again you can see it will dial a 9 to get the outside line, pause due to the comma,
dial a 1, the area code F, and then the number G.
So it would look something like this 9,18015555555.
The third is For International calls dial.
This is just like the others.
The system will dial 9 for an outside line, pause with the comma,
dial 011 for international, pause again with the comma,
dial the country code you setup in the connection E,
dial the area code F, and finally the rest of the number G.
You're all setup.