Windows 95/98 Dial Up Set Up Instructions - by ConnectTo.net
Setting Up Windows95 to Connect to the Internet
1. First you need to ensure that "Dial-Up Networking" is installed. You can check this by: double-clicking on the "My Computer" icon and look for a folder called "Dial-Up Networking". If it is present, skip to step #3. If it is NOT, proceed with step #2.
2. Double-click on the "My Computer" icon, then double-click on the "Control Panel" icon. When the Control Panel is opened, double-click on the "Add/Remove Programs" icon. Click on the tab named "Windows Setup", then double-click on "Communications". Check the "Dial-Up Networking" box then click on "OK", then click "OK" again. At this point, you'll be prompted to insert your Windows 95 disk or CD. Once Windows 95 has finished copying files, and you have re-started your computer, proceed to step #3.
3. Double-click on the "My Computer" icon, then double-click on the "Control Panel" icon. When the Control Panel is opened, double-click on the "Network" icon. Click "Add", Select "Protocol", then click "Add". You will now see a split screen. On the left, choose "Microsoft", on the right choose "TCP/IP", then click "OK". Once Windows 95 has finished copying files, proceed to step #4.
Assuming that the TCP/IP protocol and the Dial-up Adapter have been installed, you will now follow the instructions below:
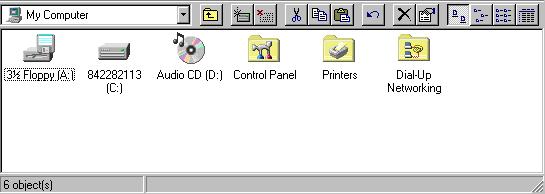
4. Double click on the icon labeled "My Computer" located on your desktop.
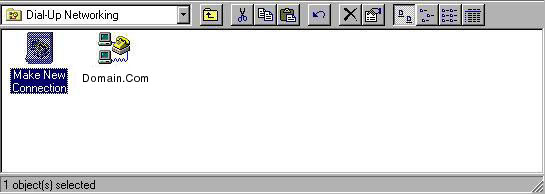
5. Open the "Dial-Up Networking" folder.
6. Double-click on "Make New Connection".

7. Type ""your host name, ie. connectto.net or gct21.net" on the first line. (Your modem should be displayed in the second box. If not, you need to go back to "Control Panel", "Modems", and install it.).
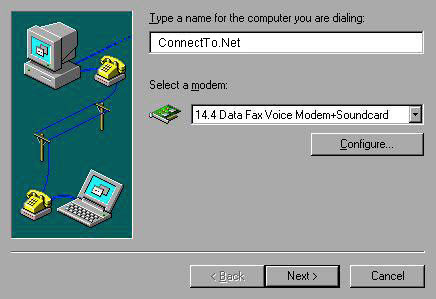
8. Then select "NEXT".
9. Type in the Area Code - 000, and the Phone Number - 000-0000.
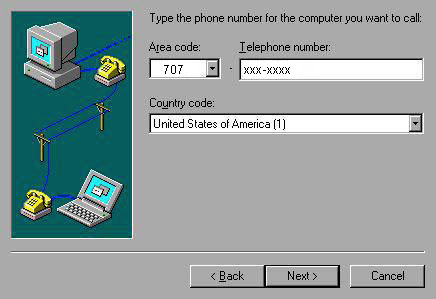
10. Then select "NEXT".
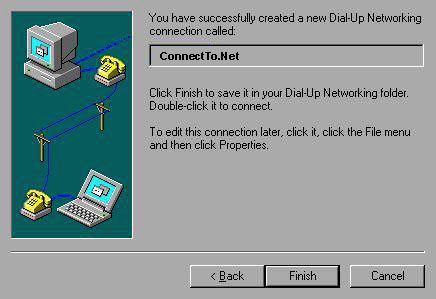
11. Now press "FINISH".
12. Click once on the "your host name, ie. connectto.net or gct21.net" icon to highlight it.
13. Right Click on "your host name" and select "Properties".
14. Uncheck "Use Country and Area Code".
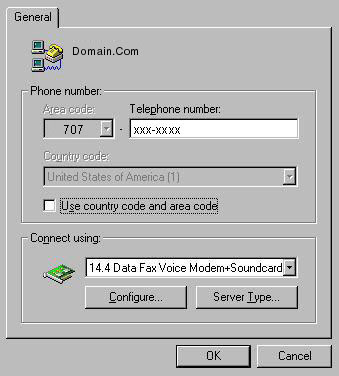
15. Now press "Configure".
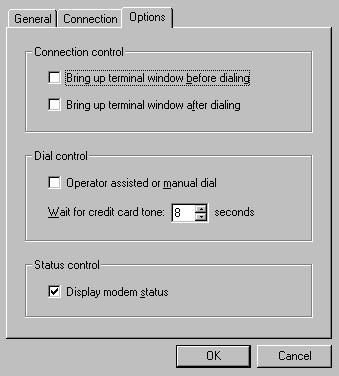
16. Press the "Options" tab.
17. Make sure "Bring up terminal window before dialing" and "Bring up terminal window after dialing" is NOT checked.
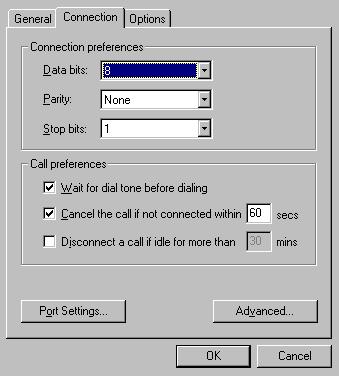
18. Now press the "Connection" tab, leave the defaults. Be sure to uncheck "Disconnect a call if idle" line.
19. Click on "OK".
20. Click on "Server Type" which will bring up "Server types display".
21. The "Type of Dial-up Server" Should say "PPP, Windows95, NT, Internet".
22. Advanced Options should have "Log on to network" and "Enable software compression" checked.
23. Only TCP/IP should be checked under "Allow network protocols".
24. Press the "TCP/IP Settings" button.
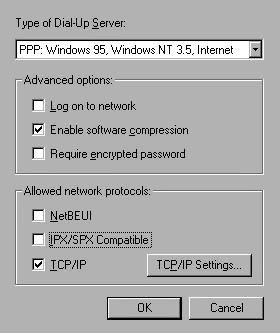
25. "Server assigned IP Address" should be checked.
26. "Server assigned name server addresses" should be checked.
27. Check "Use IP header compression"
28. Check "Use default gateway on remote network"

29. Select "OK" then "OK" again, then "OK" again to close.
30. Click once on the "your host name" icon and while holding down on the mouse button, drag the icon into your desktop. This will create a shortcut.
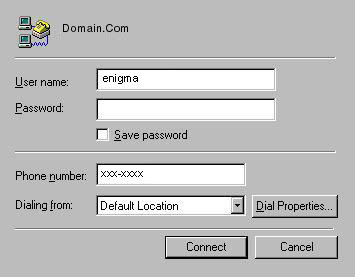
31. Double click the "your host name" icon and it will bring up the dial box. Enter your password and press "Connect". After dialing, it will bring up another dialog box stating that you're connected.
32. Open your Browser software and enjoy the Internet!
Back To Set Up Instructions